Almost as soon as I agreed boxes started to show up. All sorts of parts arrived. I carefully packed them in two suitcases and off I went.
On the flight from Orlando to Bogota I was feeling very hot and weak. To make matters worse, just before landing I read the declaration form. On the back of this three part form was a small statement something like “automobile parts will be impounded and subjected to normal importation procedures”. Great. Now I was really sweating. Certainly Bogota was not the place to come with a suitcase or two of car parts. When the plane landed I got out to face my fate. And the fate was to wait for two hours while thousands of people waited to get through immigration and customs. Now I was really feeling bad. Hot, sweaty, dizzy and weak and not sure what was going to happened. I started a mantra that Gomo(my wife) had taught me and meditated on Padmasambhava. I breezed through immigration, picked up my luggage and made my way over to one of about a dozen gates each with a person checking the declaration forms. The gate was so crowded dozens of people were trying to get through it with piles of luggage. I gave my form to the girl and she asked “anything to declare?” I said yes quietly and waited for what was to come. She pressed a buzzer and a soldier appeared on the other side waiting. Suddenly a man next to me became impatient, and shoved his form at the lady and barged ahead of me through the gate into the waiting arms of the soldier. Sige (follow) he commanded as they disappeared into a room. Seizing my chance I calmly walked to the exit in the confusion. Once outsize I quickly got a cab and was free. I was through.. Onto the next step.
I traveled to Villa De Leyva (pronounced “vijaa de layba”) and met Mike and Trish. They were very happy to see me and we quickly made plans for the week to come as we unpacked the suitcases and gazed at all the treasure.
Day One: The day started with Mike and I unbolting everything in sight. I put everything in plastic bags and labeled tape on it. We managed to remove everything EXCEPT for the pistons. We were not going to take the engine out and split the case. But we had a big problem. There was no way for us to remove the “wrist pins”. These are stainless steel pins about an inch in diameter by about three inches long. Each end was held in place by “Circlips”. These circlips fit into a groove on each side of the piston. The idea is the pin goes through one end of the piston, through the connecting rod, and into the other size of the piston. The clips hold them in place. That night Mike and I brainstormed about how to remove the pin but came up blank... I said to Mike “Tomorrow night we will be pondering another problem”.
(Daily Trish Nervousness Meter:7)

Engine torn down
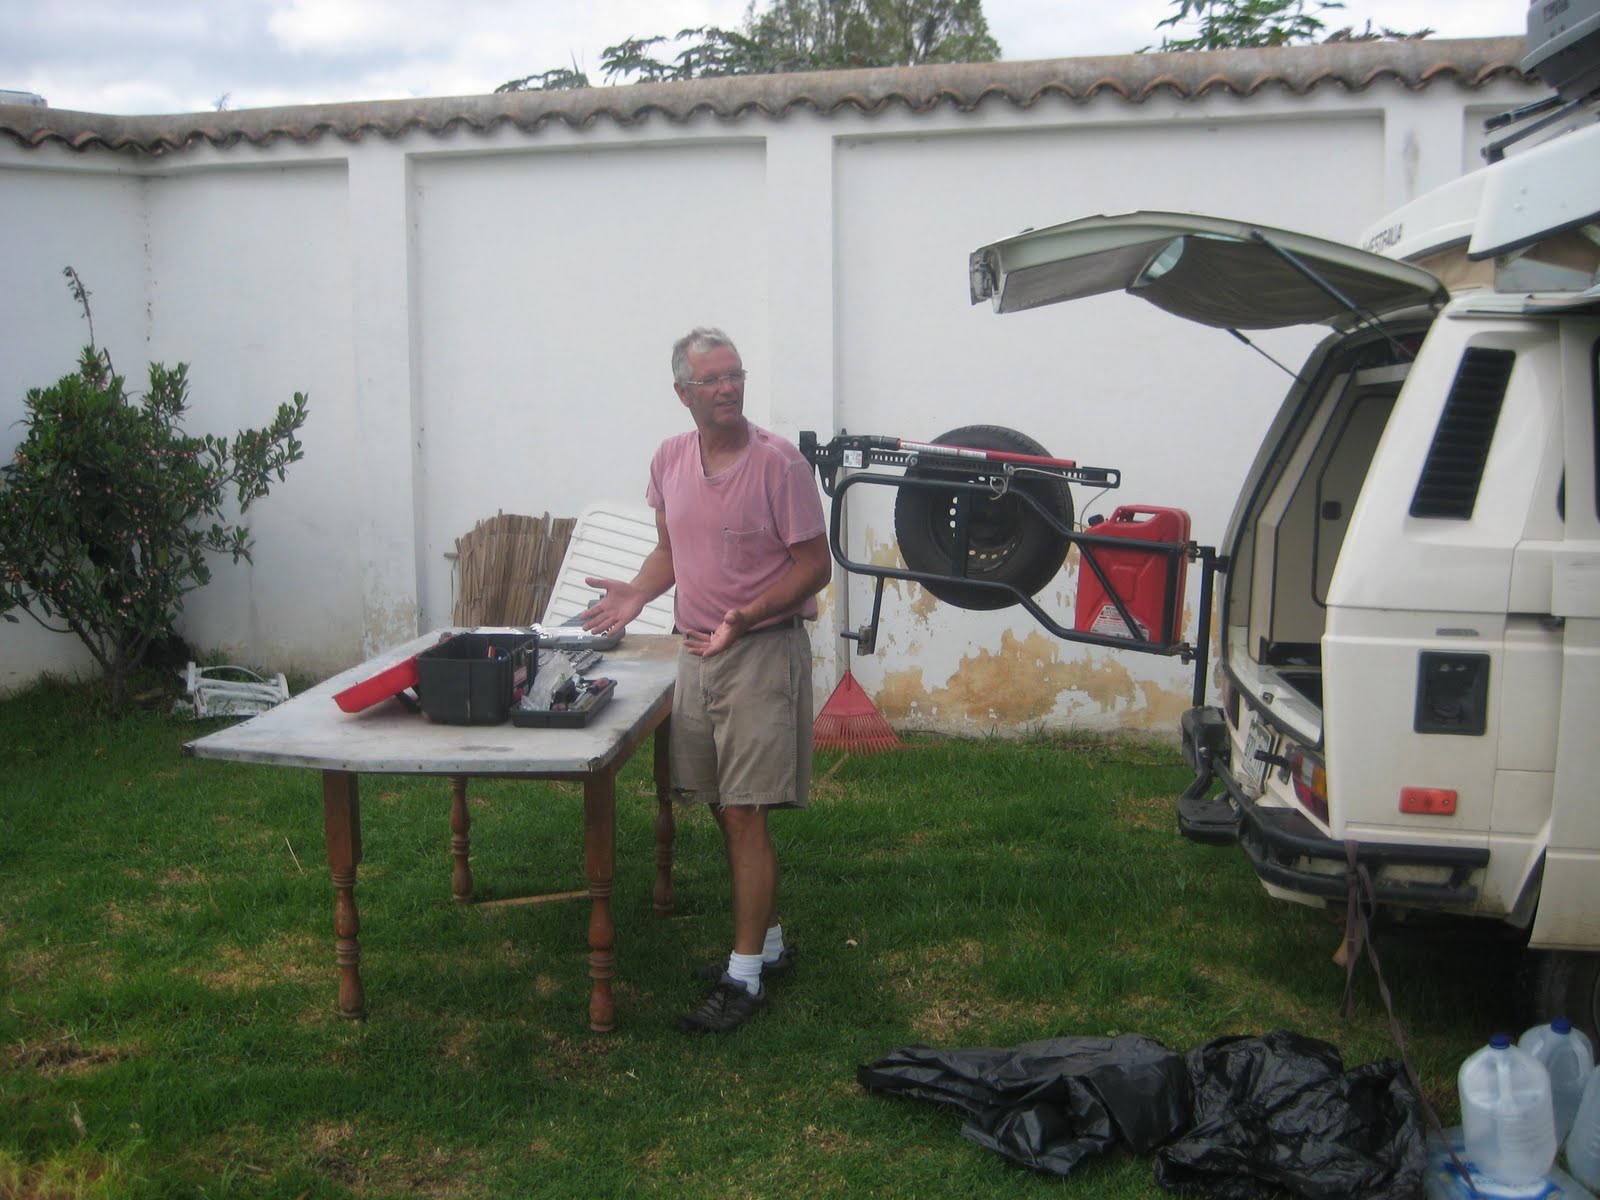
Mike setting up our "Workbench"
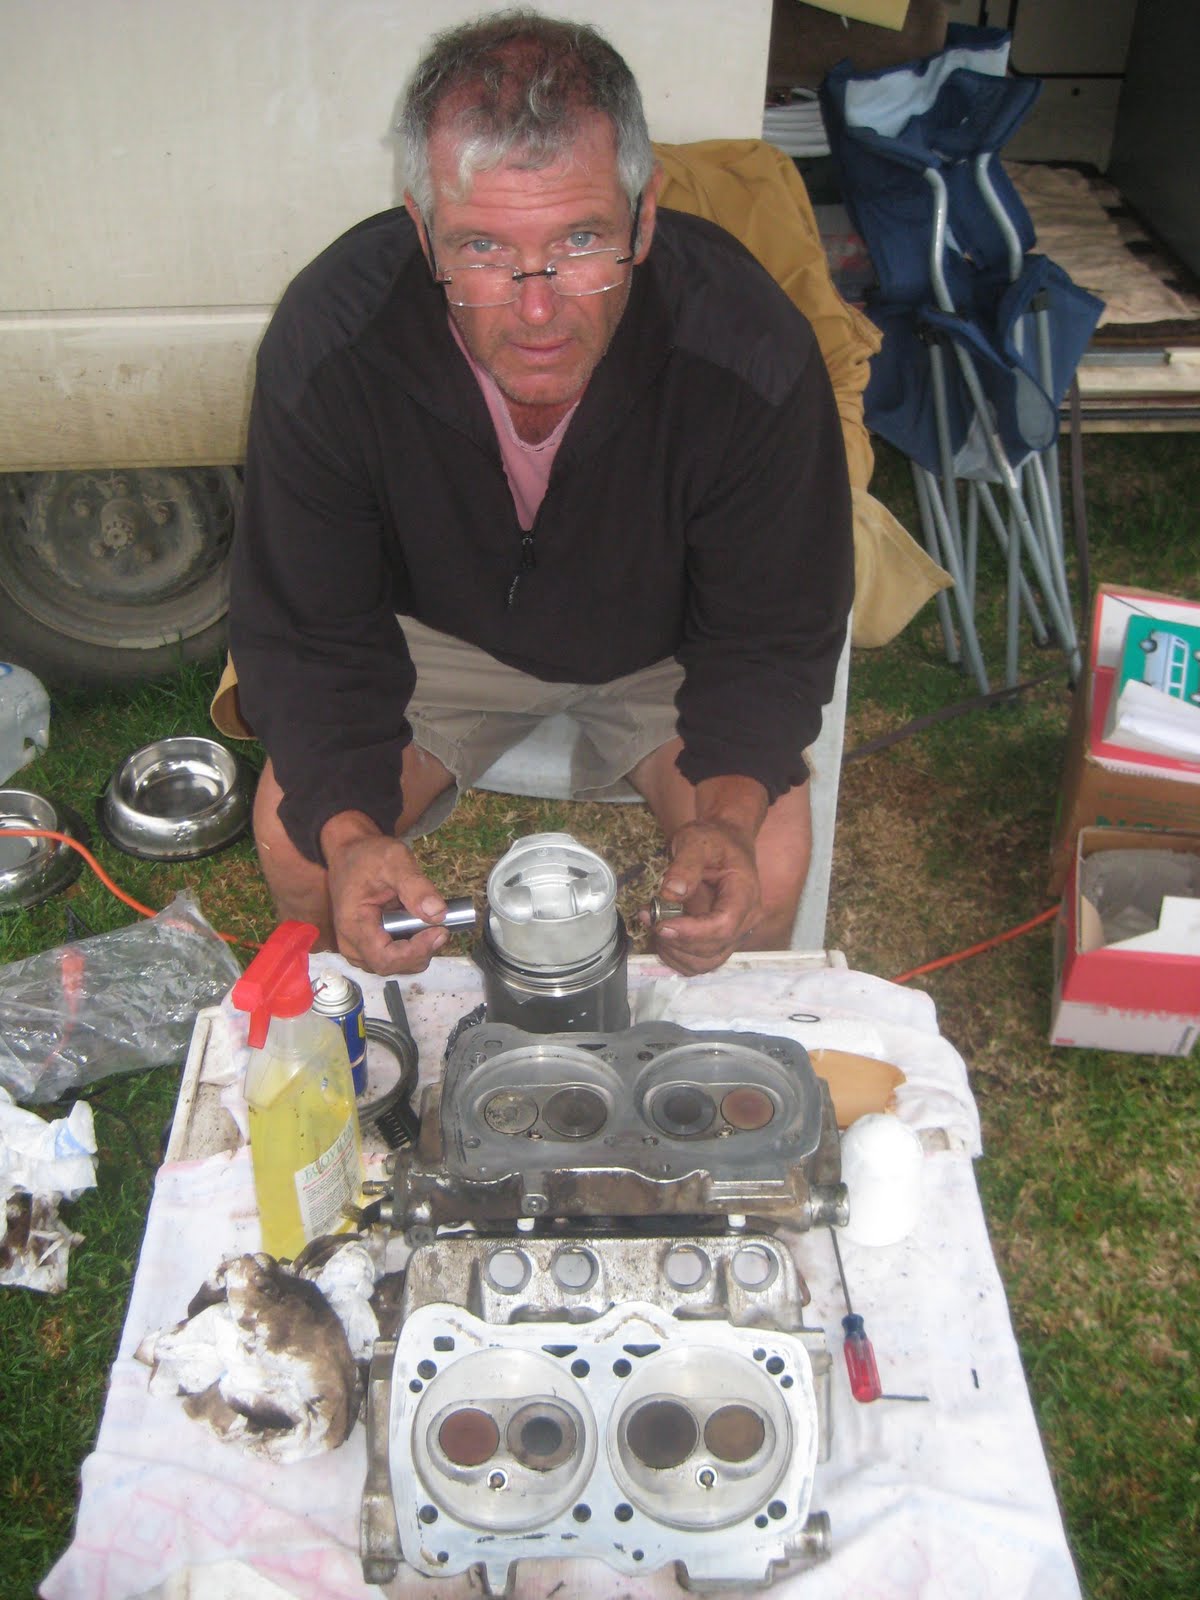
Mike checking out the new cylinders and pistons. Note the cleaned heads ready to go...
Day Two: Mike was at my door first thing in the morning and we hatched a plan. MikeGyver was proposing a tool to remove the pins. The tool consisted of some all-thread, two nuts and a washer. We would cut the all-thread, put it through the hole in the middle of the wrist pin. Slip a nut between the criclip over the end of the writst pin, and tighten the nut on the accessible side. We tested the tool and made a few adjustments. Voila! It worked like a champ and within and hour or so we had all four pistons off. Hats off to the MikeGyver!
The rest of the day we dedicated ourselves to removing the connecting rods. These are heavy steel rods with a large hole and one end (bolts onto the crankcase) and a smaller hole at the other end which the wrist pin goes through to hold the pistons in place. Of course on places like http://www.thesamba.com/ they say it's “almost crazy” to do this with the engine in place, but here we were. I wonder what they would say if they knew we were doing it on a grass “Zona De Camping” lot in central Colombia between rainstorms? Muy Muy Loco?
Anyway we got to work taking them off. The big problem was that if any of the nuts, caps or bearing shells (fit inside the larger opening) fell into the crankcase the gig was up. There would be no way to retrieve it without taking the engine out. Which we didn't want to do as we did not have the equipment for it. I held the backcap in place while Mike unbolted the caps. This is no easy feat since I had to exert a lot of pressure for Mike to be able to pull the cap off. Not only that, but getting my hand inside the crankcase was tough as my hands are large and I had to squeeze them in between the lobes of the crankshaft. A few times I though my fingers were stuck as Mike slowly rotated the crankshaft to get access to the bolts. One time a cap slipped away and rotated down and fell. Mike yelled “Don't move a muscle!! He delicately removed the half shell and cap which had wedged themselves between two lobes on their way to the black hole. During this process Trish jumped out of the van and it gave a small bounce. I tersely yelled at her “Don't move!! Don't do anything!! Once rescued we let out a sigh of relief. Disaster averted... I felt bad for yelling at Trish and apologized. At the moment there was no time for niceties (Daily Trish Nervousness Meter: 10)

MikeGuyver holding wrist pin removal tool
Day Three: We began the day with a brilliant idea from me. Let's put a drop or two of blue locktite on the rod bearing shells so they won't pop off and slide into the crankcase. We tried it out and installed the first rod. It was binding and would not turn. Stuck. Hmm. We took it out and thought about it. We then realized that even the smallest thing would affect the clearance between the rod and the crankcase. So, off we went and removed all the locktite. This took about an hour but afterwards the same connecting rod installed and worked perfectly. We installed the remaining three connecting rods delicately but perfectly. The last one (number 2 cylinder) was binding but a few taps with a wood stick and a hammer and it set the bearing shells perfectly (this is the recommendation from the Bentley Repair Manual to keep the rod bearing shells from binding). At this point we had had it even though it was only 2:30PM. We were fried. Better to get some rest for the big day on Thursday, which was piston/cyclinder/head installation. The big enchilada!
(Daily Trish nervousness meter: 9)
Day Four: Today is a big day. We are going to install the pistons, cylinders and heads. This is a somewhat complicated procedure due to the fact that the sealant that we will use has a working time of 45 minutes. That means that each side (there are four pistons/cylinders and two heads) should take forty five minutes. We cleaned all the surfaces with solvent and anything that we missed before. The first piston was ready to go. First problem, we couldn't get the wrist pin into the piston, finally with this accomplished we tapped the wrist pin trying to get it into the connecting rod. After many tries we decided to pull it out and take a look. The bushing (a brass sleeve pressed inside the connecting rod), was damaged slightly. The edge now had a small lip where we were trying to bank in the wrist pin. We realized that the wrist pins would have to be able to glide into the holes in the pistons and connecting rods. After cleaning the sealant off, we took some emery paper (sandpaper) and gently removed all burs and edges. I took a file and filed off the lip from the connecting rod. We oiled it up and voila! It worked! The wrist pin slide in with a small amount of pressure and Mike put on the circlip to hold on the wrist pin (The other circlip was installed before we put in the piston). The other piston and cylinder went with a minimum of fuss. The cylinder sleeves took a bit of wrangling to get them into place but finally that was done. We tapped the edges of the cylinders gently with a piece of wood and a hammer to set the adhesive. Last step is to install the head. This means first putting the head gasket into place and then torquing the head on. We quickly put on the adhesive (Special sealant comes with head gasket set) and slid the head over the head studs. I then installed the push rod tubes (four per side). These tubes have accordion style ends which compress when the head is torqued down. Once these were in place I began the laborious torquing procedures. With Mike telling me the sequence and FT/LBS for each round I torqued each head in turn. Finally it was done. The engine block was complete. We called it a day and had a Colombian Poker Beer.
(Trish nervousness meter: 8)

Makeshift cleaning table courtesy of "Oscar" the camp ground owner. Nice place under the awning!

Birds eye (grass eye maybe) view of number one and two cylinders and pistons installed ready for head installation.
Day Five: We began the day with the goal of getting the engine started but we had a lot to do. We began with Mike putting in a new water pump (a good amount of work). He had previously installed a new oil pressure sending unit. I started by putting on the push rods and rocker arms. Unfortunately I couldn't get them to seat into the hydraulic lifters. I had installed them wrong, bent three push rods, and I gave it over to Mike to do. He installed them correctly and that was done. As luck would have it we had some spare push rods. At the end of the day we had everything done but the exhaust, muffler, and engine tin. We decided to try to start up the engine without the muffler to see if it would start. It started right up! Loud, valves clacking which quickly quieted down and the engine was running.
Five o'clock time to quit. Hopefully tomorrow we can get everything done. (Trish nervousness meter: 5)
Day Six: By noon we had the exhaust, engine tin and skid plates in and the engine running. Problem was it sounded somewhat anemic. We tidied up a bit and went for a test ride. Up the first hill the van barely made it up. I looked at Mike with a WTF? look and back we went. We adjusted the valves and off we went again. Slightly better. Back again. Mike started checking the injectors. One, Two Three... oops, injector three isn't plugged in. That would do it.. With a grin he plugged in the injector (actually the electrical control plug that plugs onto the injector to control the gas spray) and the engine perked up. The next test drive we were in business. The burly beast was back!
(Trish nervousness meter: 3)

Engine reassembled and ready to go!

Trish and Mike enjoying the end of the day
Day Seven: We were exhausted by this time but off we went to Javier's garage to beg the use of a timing light. We had gone onto http://www.thesamba.com/ to read what TenCentLife (the guru of waterboxer engines) had to say about timing. Armed with a printout of his instructions we took Javier's light and adjusted the timing. We wound up having to do it again the next day but now the engine was running strong. We were done. Mike and I were completely toast at this point. Sore and lazy and tired, we enjoyed a well earned Colombian Poker Beer.
(Trish nervousness meter: 2)
Epilogue: After I left Mike traced out a few more problems like the low oil pressure buzzer going off. He traced it back to faulty wiring connections. Evidently there were a few more bad connections and he fixed them as well as cleaned all the fuel injectors. Now the burly beast is sounding primal and ready to go. Colombia was a great experience for me. Both getting to spend some time with Mike and Trish and Chettie and to see a fantastic country. Villa De Leyba is a beautiful town well worth a visit.
If you every get the chance to rebuild a waterboxer engine on a grass lot in the middle of Villa De Leyba in Colombia don't pass it up!!
(Trish nervousness meter: Back to normal)


Love the Trish Nervous Meter! So back to Normal - is that a 0 I hope :)
ReplyDeleteWhere are you guys now?
mike and trish,
ReplyDeleteit's june 11. please check in.
brother john.